Hammer drills are powerful tools that can make quick work of tough jobs. One of the tasks that a hammer drill can assist with is removing lug nuts. Lug nuts can be stubborn and difficult to remove, especially if they are rusted or overtightened. A hammer drill can make the job much easier and faster.

To use a hammer drill to remove lug nuts, first, choose the right drill bit. Depending on the type of lug nuts you are trying to remove, you may need to use a specific drill bit. For example, if you are using a hammer drill, you will need to use a bit that is specifically designed for drilling into lug nuts. Once you have the right bit, insert it into your hammer drill and tighten it securely.
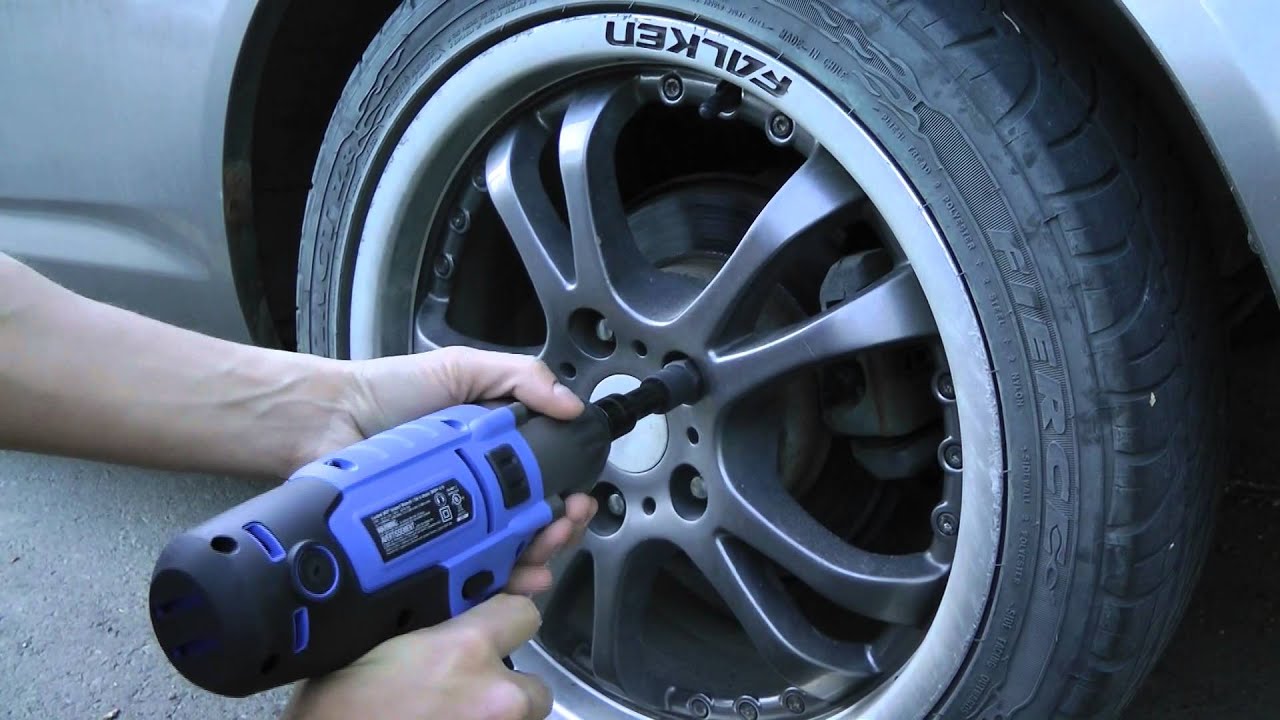
Next, position the drill bit on the lug nut and apply pressure to the drill. Start the drill slowly and gradually increase the speed until the lug nut begins to turn. Be sure to keep the drill bit straight and steady to avoid damaging the threads on the lug nut. With the right technique and a bit of patience, you can use a hammer drill to remove lug nuts easily.
Understanding Hammer Drills

A hammer drill is a powerful tool that is used for drilling into hard materials such as concrete, brick, and stone. It is a type of rotary drill that has a hammering action, which enables it to break through tough surfaces. Hammer drills are commonly used in construction and DIY projects.
How Does a Hammer Drill Work?
Hammer drills work by combining a rotary motion with a hammering action. The drill bit rotates as it hammers into the surface, creating a hole. The hammering action helps to break up the material, making it easier for the drill bit to penetrate. This is especially useful when drilling into hard materials such as concrete.
Types of Hammer Drills
There are two main types of hammer drills: corded and cordless. Corded hammer drills are powered by electricity and are more powerful than cordless drills. They are also more reliable and can be used for longer periods of time. Cordless hammer drills, on the other hand, are powered by rechargeable batteries. They are more portable and convenient, but may not have as much power as corded drills.
Features of Hammer Drills
Hammer drills come with a variety of features that can make them more effective and easier to use. Some of these features include:
- Variable speed: This allows the user to adjust the speed of the drill to match the material being drilled.
- Depth stop: This allows the user to set the depth of the hole to be drilled, ensuring accuracy and consistency.
- Reverse mode: This allows the user to reverse the direction of the drill, making it easier to remove the drill bit from the hole.
Overall, understanding the basics of hammer drills is essential for anyone who wants to use them effectively. By choosing the right type of drill and using the appropriate features, users can ensure that they get the best results from their drilling projects.
Safety Precautions Before Starting

Before using a hammer drill to remove lugnuts, it is important to take some safety precautions to prevent accidents and injuries. Here are some safety tips to follow:
Wear Protective Gear
The user should wear protective gear such as safety goggles, gloves, and a dust mask. Safety goggles can protect the eyes from flying debris and dust. Gloves can provide a better grip and protect the hands from sharp edges. A dust mask can prevent inhalation of dust particles.
Check the Drill
Before using the hammer drill to remove lugnuts, the user should check the drill for any signs of damage or wear. The chuck should be tight and secure. The drill bit should be sharp and free of any defects. The user should also check the power cord for any signs of damage.
Secure the Lugnuts
The lugnuts should be securely fastened to the wheel hub. Loose lugnuts can cause the wheel to wobble or even come off while driving. The user should also make sure that the vehicle is parked on a level surface and the parking brake is engaged.
Follow Manufacturer’s Instructions
The user should read the manufacturer’s instructions before using the hammer drill to remove lugnuts. The instructions will provide information on how to use the drill safely and effectively. The user should also follow the recommended speed and torque settings for the drill.
By following these safety precautions, the user can safely and effectively use a hammer drill to remove lugnuts.
Essential Tools and Equipment

When it comes to removing lug nuts with a hammer drill, there are some essential tools and equipment that one should have. These tools and equipment will make the process easier and safer. Here are some of the most important ones:
Hammer Drill Selection
The first and most important tool is, of course, the hammer drill itself. When selecting a hammer drill, it is important to choose one that is powerful enough to handle the job. It should have a high torque and be able to deliver a high impact force. A corded hammer drill is generally more powerful than a cordless one, so it may be a better choice for this task.
Lug Nut Adapters
Another essential tool is a set of lug nut adapters. These adapters allow you to attach the drill bit to the lug nut securely. It is important to choose the right size adapter for the lug nut you are working on. Using the wrong size adapter can damage the lug nut or the drill bit, or both.
Protective Gear
When using a hammer drill to remove lug nuts, it is important to wear protective gear. This includes safety glasses or goggles to protect your eyes from flying debris, as well as gloves to protect your hands from the heat generated by the drill. It is also a good idea to wear ear protection, as hammer drills can be quite loud.
Overall, having the right tools and equipment is essential for removing lug nuts with a hammer drill. By selecting a powerful hammer drill, using the right lug nut adapters, and wearing protective gear, you can ensure that the job is done safely and efficiently.
Preparing the Hammer Drill for Use

Before using a hammer drill to remove lugnuts, it’s important to ensure that the tool is properly prepared for use. Here are the steps to follow:
- Select the right drill bit: The first step in preparing the hammer drill for use is to select the right drill bit. For removing lugnuts, it’s recommended to use a 1/2-inch or 3/4-inch masonry bit. These bits are designed to handle the tough, hard surfaces of lugnuts and will make the job much easier.
- Attach the drill bit to the hammer drill: Once you have selected the right drill bit, the next step is to attach it to the hammer drill. To do this, insert the bit into the chuck and tighten it securely. Make sure that the bit is straight and centered in the chuck to ensure smooth operation.
- Adjust the depth stop: The depth stop on the hammer drill is used to control the depth of the hole you are drilling. For removing lugnuts, it’s important to adjust the depth stop so that you don’t drill too deep and damage the wheel. To do this, set the depth stop to the appropriate depth, which is usually 1/4 inch or less.
- Check the power source: Before using the hammer drill, make sure that it is properly plugged in or that the battery is fully charged. If the power source is not working properly, the hammer drill will not operate correctly and could be dangerous to use.
By following these simple steps, you can prepare your hammer drill for use and ensure that it is ready to remove lugnuts quickly and easily. Remember to always wear appropriate safety gear, including eye protection and gloves, when using a hammer drill.
Positioning the Hammer Drill Correctly
When using a hammer drill to remove lugnuts, it is important to position the drill correctly to ensure that the job is done efficiently and safely. Here are some tips to help you position the hammer drill correctly:
- Secure the drill bit in the chuck of the drill: Before you start drilling, make sure that the drill bit is securely fastened in the chuck of the drill. This will ensure that the bit does not come loose while you are drilling, which could be dangerous.
- Position the drill perpendicular to the lugnut: When positioning the drill, make sure that it is perpendicular to the lugnut. This will ensure that the hole you drill is straight and that the lugnut is removed evenly.
- Apply steady pressure while drilling: When drilling, apply steady pressure to the drill. Do not push too hard or too fast, as this can cause the drill bit to overheat and become damaged. Instead, apply a moderate amount of pressure and let the drill do the work.
- Wear safety goggles and a dust mask: When using a hammer drill, wear safety goggles and a dust mask to protect your eyes and lungs from flying debris. This is especially important when drilling into metal, as metal shavings can be sharp and dangerous.
By following these tips, you can position your hammer drill correctly and remove lugnuts easily and safely.
Technique for Removing Lug Nuts
When removing lug nuts with a hammer drill, it is important to follow the correct technique to avoid damaging the drill or the lug nuts. Here are the steps to follow:
- Secure the drill bit in the chuck of the drill. Use a drill bit that matches the size of the lug nut. It is important to make sure the drill bit is securely fastened in the chuck to avoid any accidents.
- Apply lubricating oil to the lug nut and the threads of the stud. This will help to reduce the friction and make it easier to remove the lug nut. Allow the oil to penetrate the threads for a few minutes before proceeding.
- Place the drill bit on the center of the lug nut and apply pressure. Start the drill at a low speed to avoid damaging the lug nut. Increase the speed gradually until the lug nut starts to turn.
- Continue drilling until the lug nut is completely removed. If the lug nut is stuck, try reversing the drill to loosen it. If this does not work, try drilling from the opposite side of the lug nut.
- Once the lug nut is removed, clean the threads of the stud and the inside of the lug nut. This will help to ensure that the new lug nut fits properly and is tightened securely.
Remember to always wear protective gear such as safety goggles and gloves when using a hammer drill to remove lug nuts.
Troubleshooting Common Issues
Overcoming Stuck Lug Nuts
Removing lug nuts can be a challenging task, especially when they are stuck. One common issue that can cause lug nuts to become stuck is rust buildup. If the lug nuts are rusted, they may be difficult to remove using a hammer drill. In this case, it is recommended to apply a penetrating oil to the lug nuts and let it sit for a few minutes before attempting to remove them again.
Another issue that can cause lug nuts to become stuck is over-tightening. Lug nuts that are over-tightened can be very difficult to remove, even with a hammer drill. In this case, it is recommended to use a breaker bar to loosen the lug nuts before attempting to remove them with a hammer drill.
Dealing with Equipment Malfunction
Hammer drills are powerful tools, but like any other tool, they can malfunction. One common issue that can occur with hammer drills is the drill bit becoming stuck in the chuck. If this happens, it can be difficult to remove the drill bit and continue with the task at hand.
To avoid this issue, it is recommended to ensure that the drill bit is properly secured in the chuck before beginning to use the hammer drill. If the drill bit becomes stuck, it may be necessary to use pliers or a wrench to remove it.
Another issue that can occur with hammer drills is overheating. Overheating can cause the drill to malfunction and may even result in damage to the tool. To avoid this issue, it is recommended to allow the hammer drill to cool down between uses and to avoid using it for extended periods of time without giving it a break.
Aftercare and Maintenance
After successfully removing the lugnuts with a hammer drill, it is important to take care of the tool to ensure it lasts longer. Here are some tips for aftercare and maintenance:
- Clean the drill: After use, clean the drill with a dry cloth to remove any dust or debris. This will prevent the accumulation of dirt and keep the drill in good condition.
- Lubricate the drill: Lubricate the drill chuck and all moving parts with a light machine oil. This will prevent rust and corrosion and ensure smooth operation.
- Store the drill properly: Store the hammer drill in a dry and cool place to prevent damage from moisture and heat. Keep it in a protective case or cover to prevent scratches and dents.
- Check the drill regularly: Regularly check the drill for any signs of wear and tear, such as cracks, chips, or broken parts. Replace any damaged parts immediately to prevent further damage to the tool.
- Use the right drill bits: Use the right drill bits for the job to prevent damage to the drill and ensure efficient drilling. Refer to the manufacturer’s instructions for the correct drill bit size and type.
By following these simple tips, users can ensure their hammer drill lasts longer and performs efficiently.
Tips for Efficient Lug Nut Removal
When using a hammer drill to remove lug nuts, there are a few tips that can make the process more efficient and effective.
Firstly, it is important to choose the right drill bit for the job. Depending on the type of lug nuts you are trying to remove, you may need to use a specific drill bit. For example, if you are using a hammer drill, you will need to use a bit that is specifically designed for drilling into lug nuts. This will help to prevent damage to the drill bit and ensure that the lug nuts are removed quickly and easily.
Secondly, it is important to use the correct technique when using a hammer drill to remove lug nuts. The drill should be held at a 90-degree angle to the lug nut and pressure should be applied evenly to prevent the drill from slipping. It is also important to use a steady, consistent motion when drilling to ensure that the lug nut is removed evenly and without any damage to the surrounding area.
Finally, it is important to use the right amount of force when using a hammer drill to remove lug nuts. Too much force can cause damage to the surrounding area, while too little force may not be enough to remove the lug nut. It is important to start with a low amount of force and gradually increase it until the lug nut is removed.
By following these tips, you can use a hammer drill to remove lug nuts easily and efficiently, without causing any damage to the surrounding area.
Disposing of Removed Lug Nuts
After successfully removing the lug nuts from the vehicle, it’s important to dispose of them properly. Lug nuts are typically made of metal and can be recycled. Throwing them in the trash can lead to environmental damage.
One option for disposing of removed lug nuts is to bring them to a local recycling center. Many communities have centers that accept metal for recycling. Lug nuts can be dropped off at these centers, and they will be recycled into new metal products.
Another option is to sell the lug nuts for scrap metal. Scrap metal dealers will purchase metal items, including lug nuts, for a price. This is a good option for those who have a large number of lug nuts to dispose of.
It’s important to note that lug nuts should not be reused once they have been removed from a vehicle. Reusing lug nuts can lead to safety issues, as they may not be able to withstand the necessary torque and could loosen while driving. It’s always best to use new lug nuts when replacing tires.
In conclusion, disposing of removed lug nuts is an important step in the tire replacement process. Recycling or selling them for scrap metal are both viable options that will help protect the environment and prevent safety issues.
Alternative Methods for Lug Nut Removal
While using a hammer drill to remove lug nuts is an effective method, there are other ways to remove them as well. Here are a few alternative methods:
1. Lug Wrenches
Lug wrenches are the most common tool for removing lug nuts. They come in different sizes and shapes, but the most common ones are the X-shaped and L-shaped wrenches. They are easy to use and can be found in most cars’ toolkits. However, they require a lot of physical effort to remove the lug nuts.
2. Impact Wrenches
Impact wrenches are pneumatic or electric tools that can remove lug nuts quickly and easily. They are commonly used in professional garages and tire shops. They require less physical effort than lug wrenches and are faster. However, they are expensive and may not be suitable for occasional use.
3. Socket and Breaker Bar
A socket and breaker bar is another alternative method for removing lug nuts. It is a socket that fits onto the lug nut and a long bar that is used to turn the socket. It requires less physical effort than lug wrenches but more than impact wrenches. It is a good option for occasional use and can be found in most toolkits.
4. Liquid Wrench
Liquid wrench is a penetrating oil that can be used to loosen stubborn lug nuts. It is sprayed onto the lug nut and allowed to sit for a few minutes before attempting to remove it. It can be a helpful aid for removing rusted or corroded lug nuts.
5. Hammer and Chisel
A hammer and chisel can be used to remove a damaged lug nut. The chisel is placed on the edge of the lug nut and hit with a hammer to loosen it. It requires some skill and can damage the wheel if not done correctly.
Overall, there are several alternative methods for removing lug nuts besides using a hammer drill. Each method has its advantages and disadvantages, so it is up to the user to decide which one is the best for their situation.
Frequently Asked Questions (FAQ’s)
What is the appropriate torque setting for removing lug nuts with an impact wrench?
The appropriate torque setting for removing lug nuts with an impact wrench will depend on the specific make and model of the wrench. In general, however, it is recommended to start with a lower torque setting and gradually increase until the lug nut begins to loosen. It is important to avoid over-tightening or under-tightening the lug nuts, as this can lead to safety issues or damage to the vehicle.
Can a cordless impact wrench be effectively used to remove lug nuts?
Yes, a cordless impact wrench can be effectively used to remove lug nuts, provided that it has sufficient power and torque. It is important to ensure that the battery is fully charged before attempting to remove lug nuts, as a low battery can result in reduced performance and potentially damage the wrench.
What size impact wrench is typically needed to remove vehicle lug nuts?
The size of the impact wrench needed to remove vehicle lug nuts will depend on the size of the lug nuts themselves. In general, a 1/2-inch impact wrench is suitable for most passenger vehicles, while larger vehicles may require a 3/4-inch or 1-inch impact wrench.
Why might an impact wrench fail to loosen lug nuts, and how can this be resolved?
An impact wrench may fail to loosen lug nuts if it does not have sufficient power or torque, or if the lug nuts are excessively tight or corroded. To resolve this issue, it may be necessary to use a more powerful impact wrench, apply penetrating oil to the lug nuts, or use a breaker bar to loosen the nuts prior to using the impact wrench.
Is it possible to remove lug nuts using a hammer drill, and what are the risks?
It is possible to remove lug nuts using a hammer drill, but this method is not recommended as it can be dangerous and may damage the drill or the vehicle. Hammer drills are designed for drilling into concrete or masonry, and using them to remove lug nuts can result in injury or damage to the vehicle.
What are the best practices for quickly and safely removing lug nuts?
The best practices for quickly and safely removing lug nuts include using the appropriate tools, ensuring that the tools are in good condition and fully charged, and following the manufacturer’s instructions for use. It is also important to wear appropriate safety gear, such as eye protection and gloves, and to work in a well-lit and well-ventilated area.