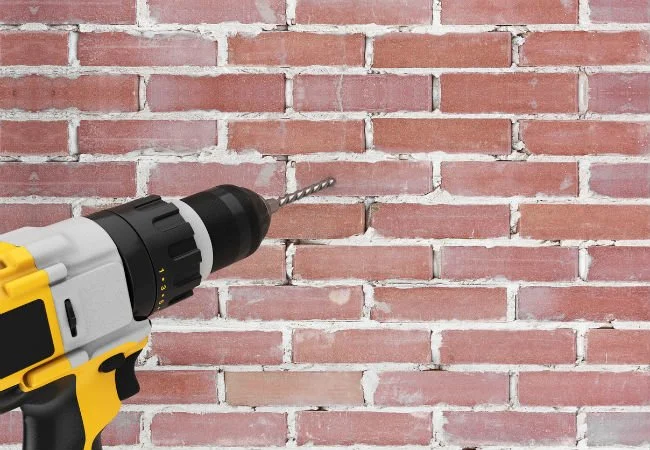
Drilling into brick walls at home can seem like an intimidating task for the inexperienced DIYer, but with the right tools, safety measures, and techniques, you can achieve smooth and straight holes. Whether you’re installing anchors to hang shelves or equipment, running wiring, setting up electrical outlets, or any project requiring holes into masonry, this comprehensive guide will walk you through the entire process from start to finish.
Determine Placement and Measure for Drilling
First, determine the placement and size of holes you need to drill. Consider the following:
- Where will the shelves, wires, outlets, etc be positioned? Mark placements with a pencil.
- What size holes do you need for anchors, conduits, or other hardware? Check specifications and guidelines.
- How deep into the wall do components need to reach? Account for 2-3” extra depth.
- Are there studs, pipes, or wires behind the surface? Use a stud finder to detect.
Once placement and size are determined, measure and mark holes to prepare drilling sites. Allow ample extra space for drill clearance.
Gather Necessary Tools and Materials
Drilling into masonry requires specialized equipment to penetrate the hard surface. Gather the following essential tools and materials:
Tools:
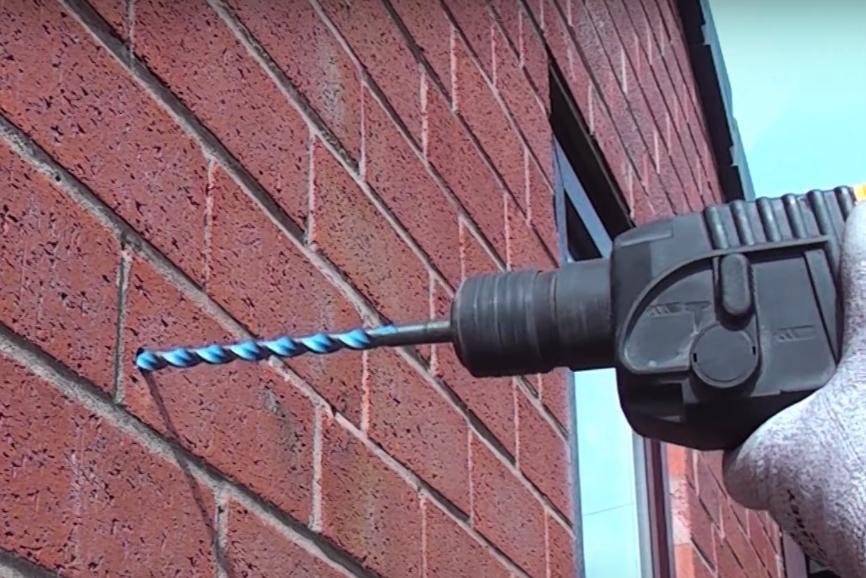
- Hammer drill (corded or cordless) – Necessary for drilling into masonry rather than standard drill.
- Masonry drill bits in appropriate sizes – Carbide-tipped to withstand brick.
- Hammer
- Tape measure
- Chalk line – Marks straight lines for rows of holes.
- Safety glasses and dust mask
- Vacuum – To manage brick dust.
- Level – Ensures holes drill straight.
Materials:
- Anchors or wall fasteners if hanging items
- Conduit, electrical boxes or covers
- Spacers or sleeve anchors
Preparing the Workspace
Set up a safe and organized workspace before drilling by:
- Clearing area of clutter, debris, and furniture
- Ensuring adequate lighting and ventilation
- Covering floor and furniture with drop cloth to manage brick dust
- Setting up ladder or scaffolding if drilling high wall positions
- Plugging in cordless tools for charging or corded tools for power supply
Sweeping and pre-drilling areas also allows easier clean up afterwards. Having a tidy area allows you to focus, prevents injury, and protects household items.
Ensure Proper Safety Precautions
Like any construction project, safety should be the top priority. Follow these guidelines to protect yourself:
- Wear ANSI-approved safety goggles to shield eyes
- Use N95-rated dust masks to prevent inhaling particles
- Wear ear protection against loud noise
- Clear area of children and pets
- Secure any ladders or scaffolds fully
- Avoid standing on uneven stools or surfaces
- Remove metal jewelry that could catch on tools
- Power down all tools when not drilling
- Maintain balance and proper footing
Following safety precautions requires minimal effort but prevents serious harm. Be alert, take your time, and drill safely.
Choose the Right Size Drill Bit
Brick walls require specific drill bit sizes based on your particular mounting hardware, anchors, and conduit. Using the correct bit diameter avoids cracking brick and produces a clean hole. Match your drill bit size to the specifications of hardware being inserted. Here is a typical size range:
- 3/16” bit – For light loads like shallow anchors
- 3/8” bit – Common for shelf brackets, light fixtures
- 1/2” bit – For plumbing, electrical boxes, heavy items
- 5/8” – For large anchors into mortar joints
Additionally, choose the correct length of drill bit. The bit should be slightly longer than the depth of the hole so maximum depth can be reached. Most drill bits for masonry range from 4 inch to 8 inch.
Always start with a smaller pilot hole then gradually size up bits as needed. Beginning with larger bits can crack delicate edges. Check hardware specifications to select suitable sizes.

Mark and Prepare Holes
Now comes the preparation work. Accurately mark all drill locations with chalk line or pencil then take the following preparatory steps:
- Use a center punch and hammer to lightly indent marked spots. This stabilizes the drill.
- Begin each hole with a small diameter pilot bit first. This initial hole guides the larger bit straight and prevents jumping or drifting.
- For rows of evenly spaced holes, create a reference line using chalk line. Clamp a straight wood guide board beneath line to keep drill vertical.
- For holes needing exact placement, create an outline template then align over marks when drilling.
Proper marking and starting holes prevents mistakes and keeps holes neatly aligned. Take time to prepare and reference lines before drilling into valued brick walls.
How to Drill Different Types of Holes
Not all holes into masonry require the same technique. The intended purpose changes drilling methods. Here’s an overview:
Anchoring and Hardware Holes
General holes for installing anchors, wall mounts, fixtures:
- Lead hole – Use masonry pilot bit to depth of 2 inches
- Widen lead hole slightly with next size bit
- Insert plastic or metal anchor sleeve flush into hole
- Screw in mounting hardware which spreads anchor
Electrical Box and Conduit Holes
Through-holes for running electrical wires require broader bits:
- Drill perpendicular pilot hole same depth as electrical box
- Gradually widen hole in 1/8” intervals with larger bits
- Stop at size that allows electrical box to slide into opening
- Chisel hole evenly if necessary to fit box
- Run wires then install box into hole
Channel Holes for Piping or Wiring
Long openings need special horizontal bits:
- Determine start/end points. Mark with masking tape.
- Line up masonry channel bit between endpoints.
- Drill gradual pass-through creating a neat trench.
- Smooth uneven sections with round or paddle bit.
- Run piping, conduit, cables through opening.
Method will vary somewhat based on your specific hardware and intended purpose. Reference included guides for hole size requirements.
How to Smooth Out Rough Edges
Despite best technique, masonry drill holes often result in uneven or ragged edges upon exit. Small chips can also form around opening lip. Take a few minutes to smooth out holes for a professional end result using these tips:
- For minor jagged bits, carefully run the largest drill bit around inner edges to smooth.
- For eliminating large chips/shards use a specialty carbide chisel and light hammer taps.
- Round over external edges with small metal file or sandpaper.
- If aesthetic matters, apply cement patch compound to patch chips and holes. Allow to fully cure before inserting hardware.
- Plaster washers (metal/plastic plates) also conceal ragged opening when fastening hardware.
Preventing ugly rough holes only requires some additional refinement. Take the time to address jagged spots for clean openings that look professionally cut.
Cleaning Up and Next Steps
As you wrap up the work, proper cleaning and debris removal prevents problems down the road:
- Carefully vacuum up all brick dust and particles which can quickly stain carpets and surfaces
- Wipe down the immediate area then mop if significant debris remains
- Dispose any broken bits of brick/tile safely
- Remove drop cloths and cleaning supplies
- Reinstall any items like outlet covers previously removed
With holes neatly cut and edges smoothed out, you’re ready to mount hardware, lights, electrical, and anything else requiring holes into masonry. Refer to specific installation guides as needed with hardware. Enjoy your newly mounted items and a cleaner, less cluttered workspace!
Frequently Asked Questions (FAQ’s)
Here are answers to some frequently asked questions about how to drill into brick walls at home:
Does brick need different drilling technique compared to wood/drywall?
Yes, brick is far denser than other wall materials which requires hammer drills, masonry bits, and gradual hole widening approach to avoid cracking. Follow specialized masonry guidelines.
Can I use a standard power drill for brick drilling?
You’ll need a heavy-duty hammer drill with impacting force to penetrate properly. Standard drills lack necessary torque and strength. Rent or buy an appropriate hammer drill.
How much pressure should be applied when drilling holes?
Apply firm, even force letting the hammering action of the drill do the work. Ease up if you see cracks forming. Standard downward pressure is usually adequate for the masonry drill to penetrate brick surface.
My brick wall has a decorative finish. Will holes damage appearance?
Some chipping may occur around hole edges. Consider concealed areas to hide openings. Or consult a masonry pro for expert hole drilling that minimizes aesthetic impact on delicate surfaces.
Can I drill through exterior brick walls to run wiring outside?
Yes, with proper conduit sleeves and waterproofing methods. Consult an electrician to ensure outside wiring meets building codes and is properly integrated.
Drilling into cherished brick walls makes anyone nervous! But armed with the right approach and tools, you can create necessary holes that stand the test of time. Refer back to these tips whenever future projects call for drilling into brick masonry.
Conclusion
The notion of drilling holes into pristine brick may seem intimidating for homeowners without masonry experience. But as we’ve explored, it simply requires thoughtful planning, specialized gear, step-by-step methods, and safety awareness. By following the techniques outlined above for preparing your workspace, marking holes, selecting suitable drill bits, smoothing rough edges, and cleaning up, even first-timers can accomplish professional results. Understanding brick’s unique demands and characteristics allows DIYers to overcome anxieties about damaging surfaces. So don your safety goggles, gear up with a hammer drill and carbide-tipped bit, review hole size needs, and go tackle your next brick drilling task confidently using the knowledge gained here! In no time you’ll have precisely drilled openings ready for whatever mounting, wiring, or installation needs called for drilling brick in the first place.