Dealing with a broken drill bit stuck in concrete can be incredibly frustrating. However, with the right tools and techniques, removing it doesn’t have to be difficult. In this comprehensive guide, you’ll learn several safe and effective methods for removing a lodged drill bit from concrete, as well as tips for avoiding breakages in the future.
Overview of the Problem
Getting a drill bit lodged in concrete is a common occurrence for any homeowner doing DIY projects or construction professionals on job sites. Attempting to forcefully yank out the stuck bit often leads to breakage and further lodging in the concrete hole. Removing a broken bit poses some risks of damage but is typically manageable with the right plan and tools.
The main challenges with stuck drill bit extraction relate to:
- Tight lodging in the concrete hole
- Extreme friction making pullout difficult
- Brittle metal prone to further breakage
- Inability to grip what remains of the bit
With care and strategic techniques like lubrication and vibration, you can dislodge the broken bit and pull it free without damaging the concrete. This guides details safe processes applicable for masonry, cinderblock, and other concrete materials.
Gather the Proper Tools
Having ready access to the appropriate gear for removing stuck drill bits will make a tricky situation much easier. The specific tools you’ll want available include:
- Penetrating Oil or Lubricant – Liquid lubricant will be critical for loosening the lodged drill bit from the concrete hole.
- Stud Extractor Set – Designed for removing broken bolts and materials lodged in holes.
- Reverse-Thread Screwdriver Bit – Also known as an easy out bit, perfect for drilling into and backing out stuck hardware.
- Hammer & Cold Chisel – When other methods fail, some forceful persuasion can jar bits free.
- Rotary Hammer Drill – More powerful hammer drill with rotational force to grind away access to stuck pieces.
- Eye & Ear Protection – Safety first! Use caution and protective gear when operating loud power tools.
- Shop Vacuum – Keep your workspace clear of dust and debris during the extraction process.
With the items above on hand, you can tackle stuck drill bits with all the proper equipment for the job. Additional options like a Dremel tool with cutting wheels or even an angle grinder can also augment the process when needed.
Now we’ll explore step-by-step techniques for removing stubborn, stuck drill bits from concrete walls and floors using various methods.
Lubricate the Drill Hole
Before attempting to extract the bit mechanically, smart first steps are to lubricate the hole and hopefully loosen the bonding. Here’s how:
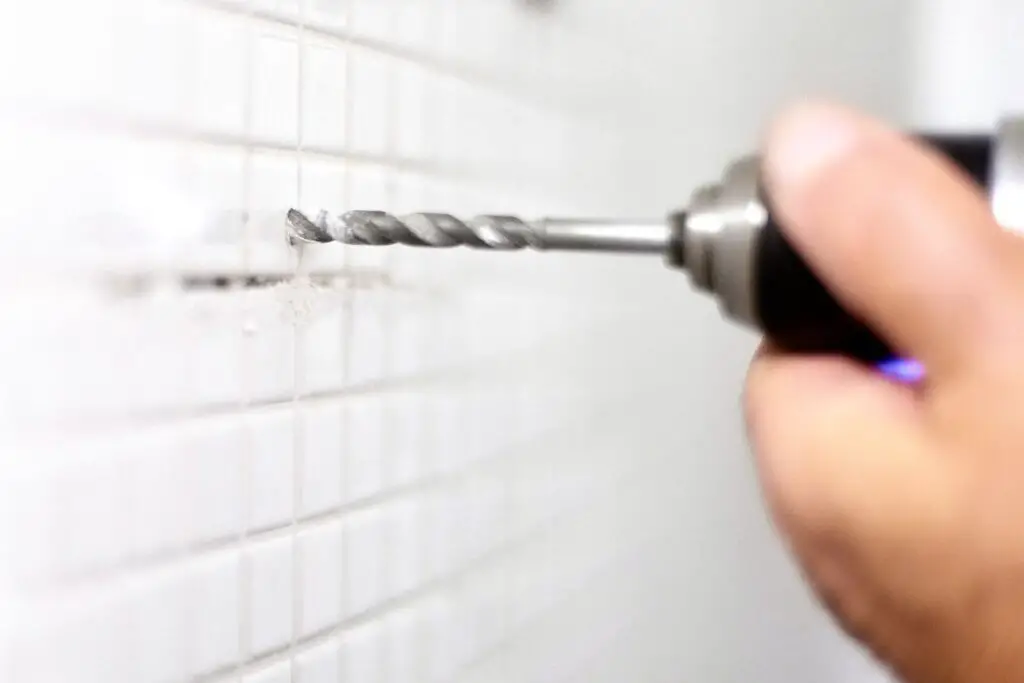
- Start by locating the lodged bit in the hole. Use a flashlight to peer inside, identifying what remains of the bit. Understanding what shape it’s in will dictate your removal plan.
- Apply penetrating lubricant liberally into the hole. Caution that some sprays and oils can stain masonry finishes. Brake cleaner can work well too.
- Avoid household lubricants like WD-40 or oils as they often lack needed viscosity and penetrating qualities.
- Let lubricant soak for 5-10 minutes. This gives time for the liquid to creep into spaces securing the stuck bit. Some patience goes a long way.
- Flush the hole out with more lubricant and use compressed air if available. The goal is washing out dust while maximizing penetrating effects around the stuck bit.
- With luck, all this lubricating action will have loosened the bonding enough to simply pull or twist the bit free. Use pliers or locking pliers to work it loose and extract if able.
If the stuck bit still won’t budge, it’s time to employ some additional methods before problems escalate.
Use a Stud Extractor
With the hole lubricated but no luck pulling the bit by hand, specialized extraction tools become highly useful:
- Stud extractor kits are made to removed broken bolts and materials wedged tightly in holes. The reverse-threading extracts stuck items threaded in tightly.
- Choose an extractor bit roughly the same diameter as the hole and drill bit shank. You want sufficient grip and traction against the broken bit’s sides.
- Carefully center the extractor bit in the hole and use an electric drill to bore into the stuck bit. Slow speed is essential to get a good bite without damaging the extractor or what remains of the drill bit.
- Reverse the drill’s rotation to back the extractor and stuck bit out together. Maintain steady pressure and allow the reverse threading action to pull both pieces free.
- Avoid forcing the extractor or drill – ease up if binding occurs. Getting impatient can lead to ruining the extractor bit or further lodging the stuck drill bit. Patience pays off.
Using stud extractors generally provides excellent stuck drill bit removal capabilities with controlled torque and gripping power. Switching between forward boring and reverse threading actions lets you work stubborn bits loose with precision.
Drill Around the Stuck Bit
When dealing with larger diameter drill bits or situations where extractors struggle, drilling out access holes around the stuck portion serves as a reliable bet. Here’s a systematic approach:
- Select a carbide or diamond-tipped bit the same diameter as the original hole saw. Matching size allows you to drill adjacent relieved holes for access and bit removal.
- Mark evenly spaced holes to drill around the original hole. These access points will remove concrete exposing the sides of the stuck metal bit for later pulling with pliers. Choose at least 4 relief holes for starters.
- Apply cooling water or lubricant as you drill the access holes. Keeping things cool prevents overheating and concrete dust buildup.
- Alternate drilling on opposing sides to relieve zones evenly until breaking fully through to the stuck bit.
- Use a punch or awl to break apart remaining concrete hugging the stuck bit.
- Finally pull the exposed bit remnants free with locking pliers or vise grips. You may be able to spin out the debris now with loosened concrete.
Drilling interim holes transforms a stubborn stuck bit into an easy extraction simply by exposing enough metal body to grip and pull it free. Doing so does sacrifice additional concrete, but clearly exposes and frees up the stuck bit.
Use a Hammer and Cold Chisel
Applying hammer and cold chisel methods takes finesse, but the jarring blows can help break stubborn drilling debris free when needed:
- Start by centering your chisel tip in line with the drill hole. Use the edge to transfer hammering force into the opening.
- Deliver firm but controlled ball-peen hammer strikes while rotating the chisel. Work at refracturing concrete while potentially unlodging the stuck portion of drill bit.
- Alternate harder and softer hammer strikes while repositioning your chisel to come at varied angles.
- Use an awl, punch or screwdriver to frequently test the bit debris for loosening as you hammer.
- Finally remove loose debris and examine the hole for any deeply interior stuck portions requiring further work.
Hammer and chisel percussion takes finesse and care to avoid marring finished concrete or surrounding walls. But the dynamic blows can clearly shake loose stubborn stuck drill bits when combined with other extraction methods.
Use a Rotary Hammer Drill
One of the most forceful options for freeing stuck drill bits utilizes a hammering rotary drill mechanism:
- Hammer drills combine spinning rotor force with axle hammering action when activated for the hardest concrete drilling tasks.
- Select a large, heavy-duty rotary hammer drill capable of carbide drilling into concrete. Using a weaker standard drill risks gear damage if binding.
- Carefully center a fresh carbide or diamond-tipped bit sized smaller than the original hole over the stuck debris. Apply water for cooling when hammer function engaged.
- Bore directly into remains of the stuck bit while pulsing between hammer engaged and standard drilling. Don’t leave hammer mode on continuously or the bit may seize up.
- Let the carbide drill flutes remove and break up debris while forcefully vibrating the stuck portion.
- Clear dust and reposition the bit to grind away all around the broken bit evenly until fully removed.
Rotary hammers provide the ultimate power for extraction, generating tremendous vibrating force and drill speed. This aggressive option quickly destroys seized drill bits. But exercise care not to damage the surrounding concrete wall.
Prevent Future Breakages
While stuck drill bit removal fills many YouTube fails and can stump almost anyone eventually, there’s wisdom in avoiding emergencies when possible. Some key tips:
- Use sharp, quality drill bits appropriate for concrete or masonry. Cheap hardware store packs often underperform and break.
- Apply water or cooling lubricant while drilling tougher concrete. Reducing friction preserves your bit life and edges.
- Avoid forcing bits by pushing excessively hard. Gentle pressure coupled with rotation speed does the cutting work.
- Pull back regularly to flush dust and re-lubricate the cutting area. Keep things clean for maximum function.
- Discard worn bits promptly to avoid unpredictable failures mid-hole with breakage. Some jobs just consume bits rapidly.
- Consider impact driver bits for high torque reliability. Electric impacts gently pulse while drilling, reducing sticking friction and driver wear-out.
Investing in suitable hammer drill or rotary hammer gear goes a very long way for critical concrete applications. But even budget gear can tackle most occasional jobs if used carefully with these stuck bit prevention insights. With the right tools and technique, removing broken drill bits need not delay your work!
FAQ’s about Extracting Broken Drill Bits from Concrete
What if I can’t remove the stuck portion at all?
Leaving a broken drill bit permanently stuck recesses into the hole happens more often than you might expect. Construction pros tend to recommend the following options when removal proves impossible:
- For small diameter holes , simply continue drilling the planned hole to full depth to expose fresh concrete beneath. Then using a hammer and chisel to open up the rim area around stuck debris before installing the planned anchor or fastener hardware. The stuck portion gets sealed in place beneath hardware.
- On larger holes make the call whether to repair the marred section with fresh concrete patching compound vs. drilling an adjacent new hole to suit the target application. Damaged appearance may not matter for some anchoring jobs.
Can I avoid breakages when overhead drilling?
Drilling vertical holes while on a ladder leads to many stuck bit emergencies. The natural tendency is pushing extra hard to support your body weight, leading to immediate binding when breakthrough finally occurs. Instead:
- Consider supporting some weight on brackets, rope, or ties attached above so you can relax arm pressure and operate the drill more gingerly.
- Or start holes horizontally whenever feasible then angle drill gradually as depth increases. Let the drill do the work without muscular forcing.
Why avoid home lubricants like WD-40?
While WD-40 enjoys cult popularity in home garages as a penetrant, cleaner, and general cure-all, it contains relatively thin viscosity oil primarily intended for displacing moisture and preventing corrosion. As far as loosening seriously stuck materials, purpose-made penetrating lubricants and freeing agents will prove far more effective. They contain active solvents paired with thicker viscosity for superior creep and hold.
How do I avoid drill bit breakage when using impact drivers?
Many DIYers rightfully love impact drivers for initiating drilling holes and driving long screws with ease. However, once the hole or screw torque develops resistance, it’s essential to swap back to standard drills and drivers. The hammering action of impacts can quickly overload and snap fragile drill bits not designed for such forces. Simply let standard tools take over for sensitive finishing work.
The Takeaway
Removing stuck drill bits from concrete can seem daunting. But having the right penetrating lubricants, stud extractors, rotary hammers, and backup techniques makes stuck bit removal very doable. Exercise patience versus brute strength, use multiple methods when needed, and most broken drill bits can be surfaced without drastic measures. And keeping fresh, sharp bits reserved for concrete tasks greatly minimizes headaches down the road. With this complete guide handy for reference, you now have all the insights needed to take on future drill bit breakages in concrete with confidence!
For other techniques, tool recommendations, or ideas on masonry work, check out [my website] to explore handyman information and project guides galore. And please leave me feedback or stuck bit questions in the comments below!